So you’ve decided to go digital for your next data collection project. Great decision! Perhaps you were persuaded by some of the benefits of going digital including lower cost, higher-quality data, and more immediate access to your data. Or perhaps you’re just tired of printing pages and pages of paper forms, dragging them around, keeping them organized, and spending hours and hours entering the data you collected by hand.
Whatever your reasons, we’re here to help ensure that your first digital data collection project is a success.
Budgeting your time
You’ve probably been using a paper form or questionnaire to record information, which you later enter into a spreadsheet or database. The first thing you’ll want to do is convert your paper form into a digital form. This digital form will replace not only the paper form but also the need to enter data by hand later.
You’re probably wondering how much time you need to develop the initial digital version of your paper form. For your first digital version, we recommend allocating 15 minutes per question. Here’s how that 15 minutes typically breaks down:
- Copying and pasting your question text into the form – 1 minute
- Choosing a good variable for the question – 1 minute
- Formatting and creating layout of question text – 2 minutes
- Choosing the right field type for the data – 1 minute
- Copying in response options and adding their values – 2 minutes
- Considering grouping with other questions and placement in the form – 2 minute
- Adding in relevance rules for when the question displays – 2 minutes
- Adding in constraints to control responses – 2 minutes
- Allocating additional time for quality testing and corrections – 2 minutes
Some fields will be easy to replicate in your digital form while others will take a little more time to plan and design. Your speed will increase with practice and greater familiarity with the features available in your data collection platform.
Getting started
VISIBLE FIELDS
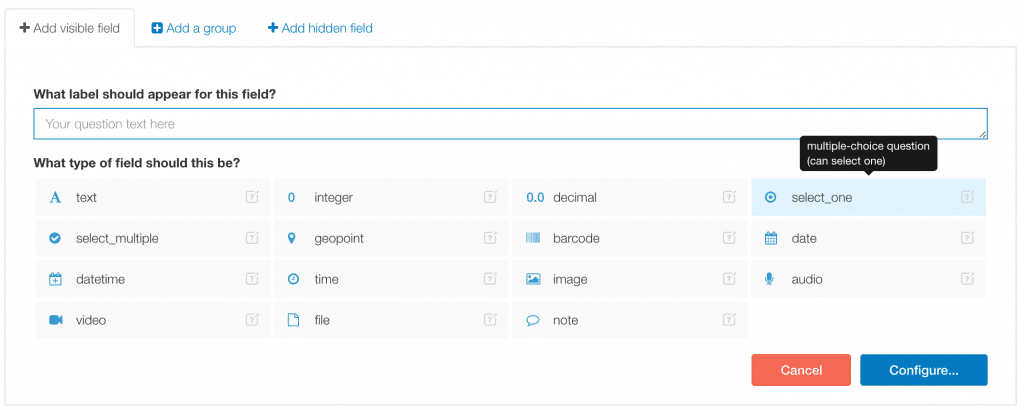
The process of using a paper form to develop a digital version starts with simple copying and pasting paired with some basic configuration. With SurveyCTO‘s online drag and drop form designer, you can easily populate your form as follows:
- Select a new field then add your question text by typing or copying and pasting
- Choose the field type (indicating the type of data to be collected)
- Click on the Configure button to specify the name of the field (the variable name)
- Choose or create a choice list of response options (if applicable to the field type). With a digital instrument, you can capture a wide range of information and media that would be challenging with a paper survey. Provided your device has the capability, you can capture photos, videos, GPS coordinates, audio, and more right from the SurveyCTO app or web form. As you transition from paper to digital, think about how you might incorporate these types of fields into your form.
Note: A SurveyCTO account is required to access many of the links in this post. To sign up for a free trial, go here.
HIDDEN FIELDS

When you’re first getting started, you don’t need to worry about hidden fields, although it may be helpful to start thinking about the types of calculations and quality audits you could run invisibly in the background of your survey. For example, many users set up random audio audits as a quality control measure. You can also run calculations that can be used for questions later in the survey or that can help you streamline your data analysis later.
GROUPS

While copying over fields from your paper form, you will want to consider displaying questions together in groups. Grouping helps keep your form organized and can also be used later if you need to repeat any groups of questions. (Sections of questions presented in a table in a paper form are typically adapted to digital using repeating groups of questions. Watch this video for help getting started.)
APPEARANCE
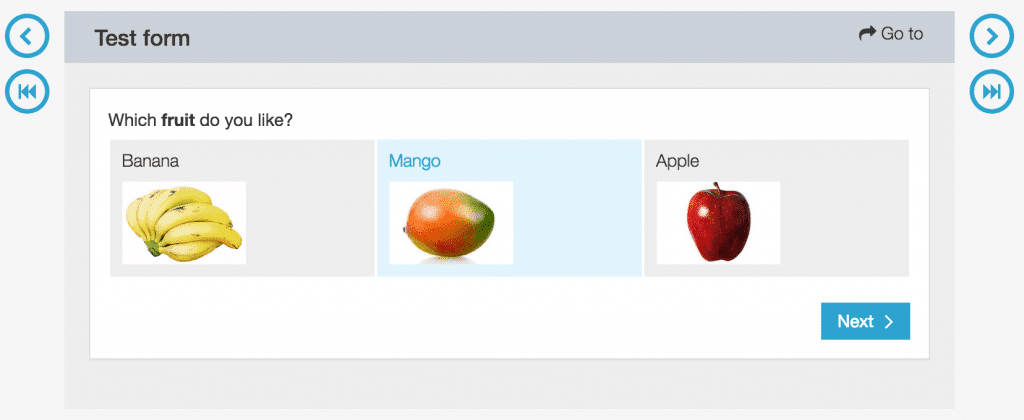
You can customize the appearance of your question labels. Try out HTML formatting in our form designer for clear and attractive questions and instruction text. You can also dynamically insert previous answers in subsequent question label text, which can improve the clarity of questions and improve the flow of survey instruments.
Additional features
RELEVANCE

Relevance is the logic that governs whether fields appear or are skipped in your form. One of the great things about digital forms is that when you create good relevance logic, users of your form never have to think about the order in which questions should be asked – the designer of the form has already thought about what the next question should be and designed the form accordingly!
To specify relevance for a field, ask yourself the question, “When is it logical for this field to appear?” Then define the relevance accordingly.
CONSTRAINTS

Constraints disallow illogical or undesired answers as defined in your form design. For example, avoid missing data by simply making your fields require an answer.
Let’s say you have a question that asks the age of a legal adult. The answers should be between 18 and 120 (if you were to account for the age of the oldest known living people). Values greater than 120 are very unlikely to be true, so if you disallow answers outside the probable range you can increase the quality of the answers you collect.
CONSISTENCY CHECKS
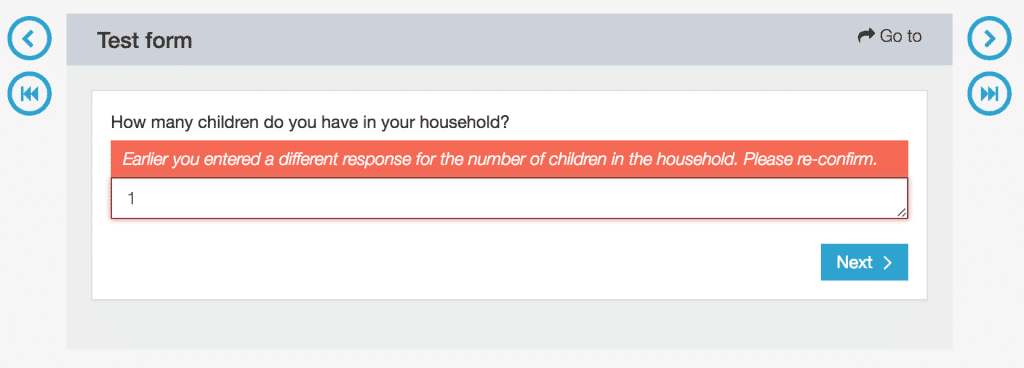
Designing logical checks that compare answers across multiple variables can also promote quality data.
For example, you might have multiple sections in your survey where you verify whether there are any children in the household. If, in one section, the respondent indicates that there are no children in the household but in a later section they indicate they do have children in the household, you can compare answers across the two sections during the survey and provide an error or warning indicating that their answers across the two sections are logically inconsistent and should be corrected.
LANGUAGE TRANSLATION

Add language translation to localize your form. You can even switch between languages in the middle of a single interview.
AND SO MUCH MORE
Other popular features include pre-configuring data for export as CSV, XLS, and KML (Google Earth) files; writing .do file templates for STATA; integrating with Google Sheets, Microsoft Word, Salesforce, and many other platforms; and encryption at rest.
Testing testing testing
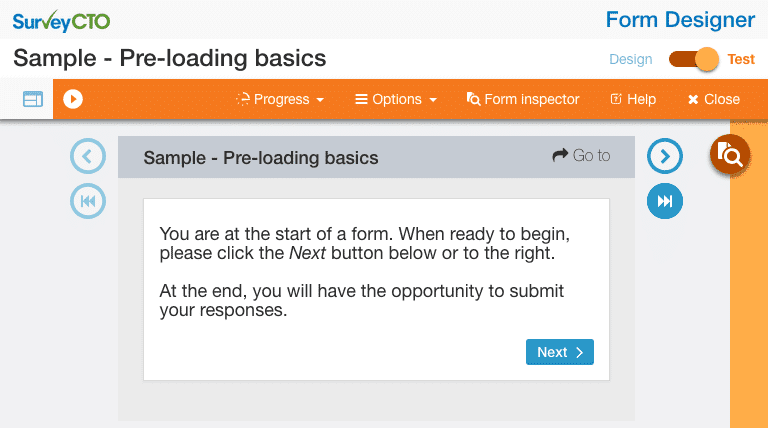
Don’t forget to test your form! First, test your SurveyCTO form in the browser from the form designer, or from the Design tab of your server console. You may realize that you need to edit your relevance or constraint logic, or your may decide that you want to revise how questions are grouped on the screen. It’s much easier to make changes before you’ve started collecting data. (If possible, get help with testing from someone who was not involved in the form development.)
Before you start collecting data from actual respondents, deploy the form and do another round of testing. You won’t regret it. In general, you should budget at least half as much time for testing your form as for initial development.
Further considerations
As you might imagine, the complexity of your form can impact how long it takes to develop the digital version. But it’s worth noting that more complex features are not necessarily hard to implement. SurveyCTO’s product documentation includes many working examples of complex designs and step-by-step instructions on how to implement the related features.
Here are some examples of complex design features:
- Repeating a group of questions a number of times and then later asking follow-up questions about the answers to the first group of repeated questions (like in a household roster). (See documentation on repeating groups and on collecting data using a roster in a repeating group)
- Dynamically filtering choice lists based on previous answers to past question. (See documentation on cascading selects)
- Randomizing the appearance of questions to create different treatments for groups of respondents (for randomized control trials). (See documentation on randomization)
- Running calculations and scoring in the background without the knowledge of enumerators. (See documentation on calculate fields)
- Creating advanced workflows where pre-existing data is is used to pre-populate forms, or where forms publish newly collected data to so that is available to pre-populate other forms. (See documentation on pre-loading)
Where possible, strive for the simplest approach that collects the data you require. If your form does require more complex elements, one approach we recommend is to create and test complex sections in their own forms first. Once you’re confident in the setup and logic, you can bring this section into the primary form.
Final thoughts
We are confident that you will see significant improvements in your data quality with a little extra work at the start of your project.
Our last piece of advice (for today) is to continuously monitor your data while it is being collected. Aside from all the built-in controls you develop as part of your digital form, one of the major advantages of going digital is that you can find and correct problems before they become systemic.
Paper-based systems involve checking paper questionnaires by hand but often the worst problems are only visible in the frequency and distribution of your data. A solid data quality monitoring system – whether through SurveyCTO’s quality checks, a dashboard you build in Google Sheets, or other approaches specific to your organization – will allow you to nimbly react to problems in the field.
If you have questions, we’re here to help!

